Saturday, August 19, 2017

Crystals in cubes

My most popular model in recent years has to be my chemistry model kit. I have been thinking all along about how to use the model kit as an educational tool, and I now have raw footage for a video tutorial and plans to draw new diagrams.

I started thinking about what other subjects could be more easily taught with a 3D model present. I came up with a few ideas that I still plan to try, but the one that stuck out was metallic crystal structures (which might have been influenced by finding out that Byriah Loper published a book last year).

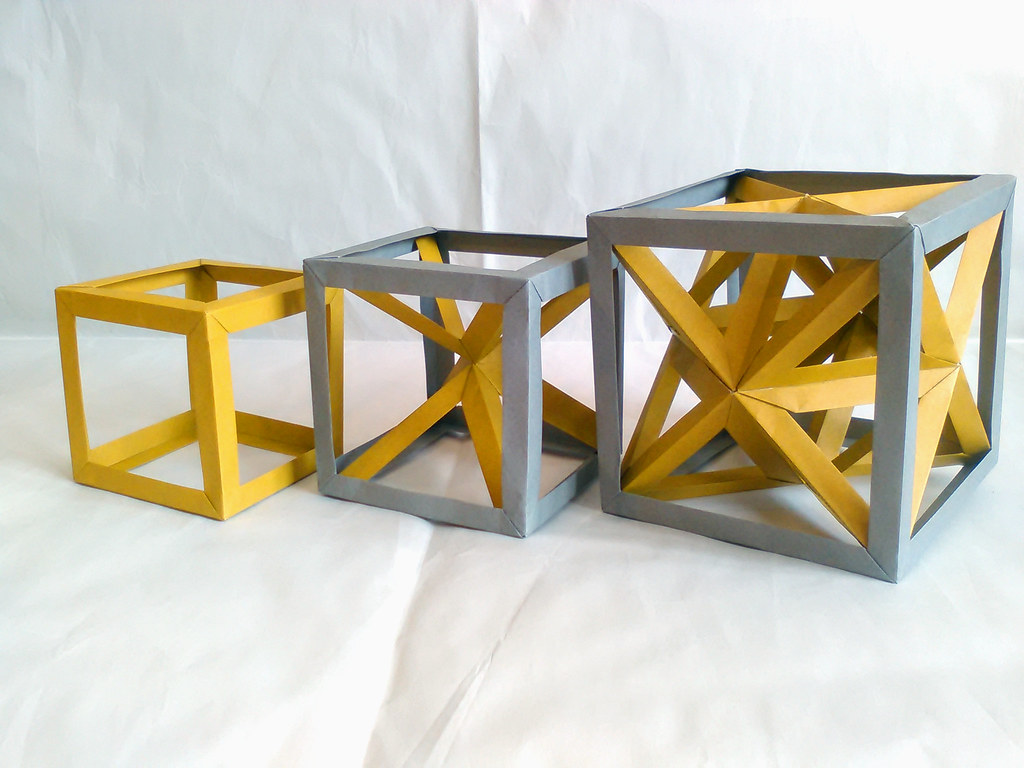
Some important concepts in chemistry are the unit cells of the three basic metallic crystal structures: simple cubic (or primitive cubic), body-centred cubic and face-centred cubic (or cubic close-packed). Among other things, chemistry students are generally asked to identify the number of nearest neighbour atoms to each (equivalent) atom. Instead of the usual dot/sphere to represent an atom, I decided to make a wireframe structure where the nearest neighbours are all connected. By folding each of these connectors from the same size of paper, I could also show the difference in size of the unit cells.

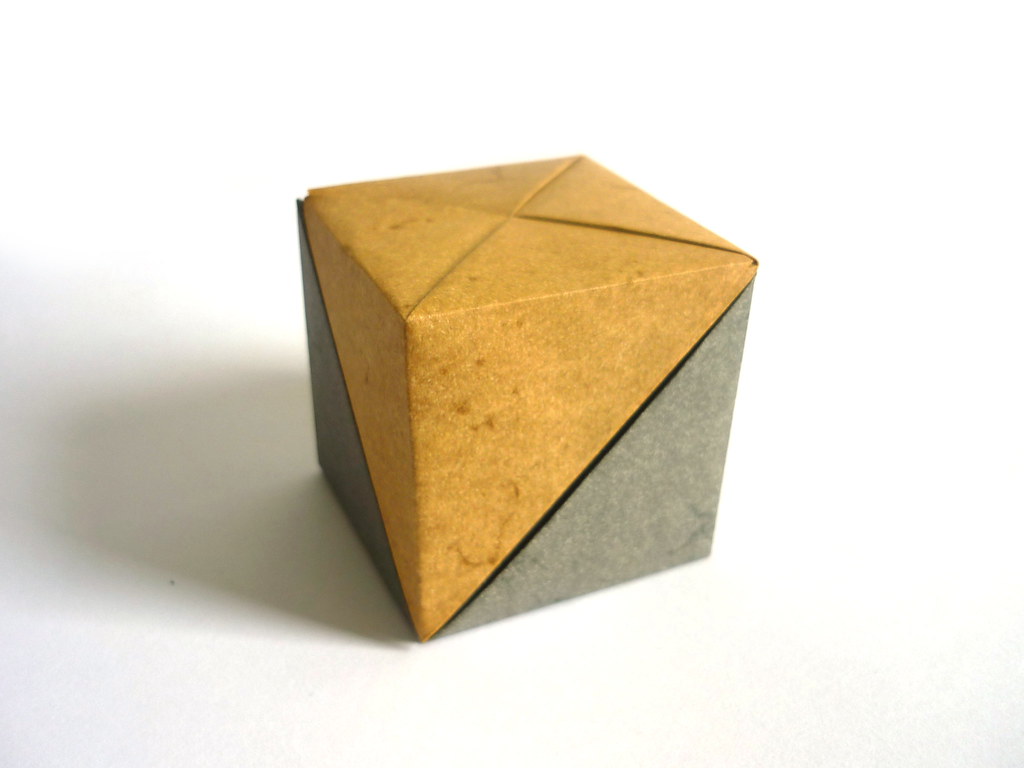
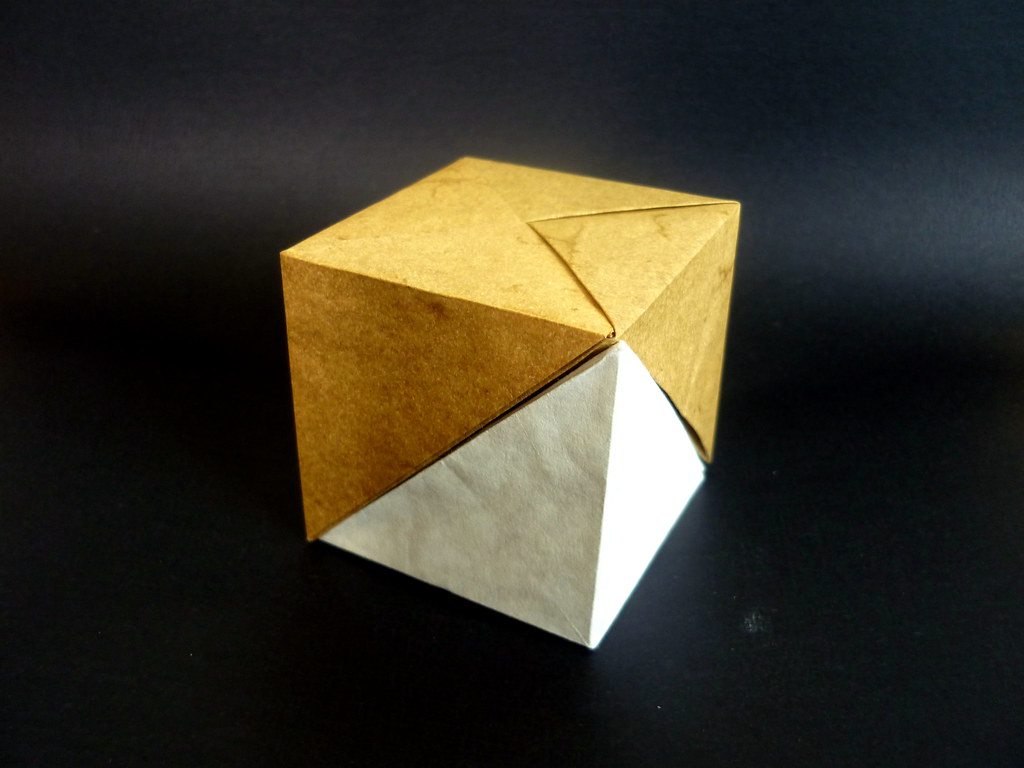
The first model was the simple cubic structure. I decided to fold each connector from a 2:1 rectangle, similar to the chemistry model kit. In order to join together three units for a cubic frame, I needed a bit of extra paper as shown by the black outline labelled A


That extra 1/4 of the paper width was used to make the flap, as shown in the CP


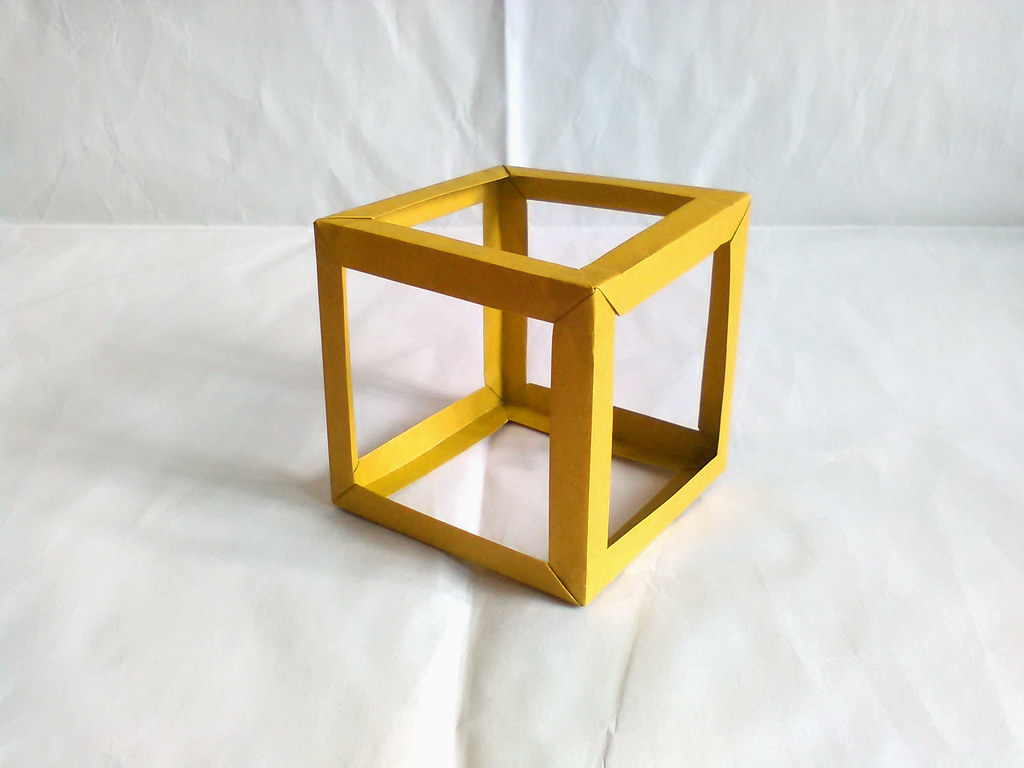
Joining 12 units together gives you this:

Crystal structure unit cells

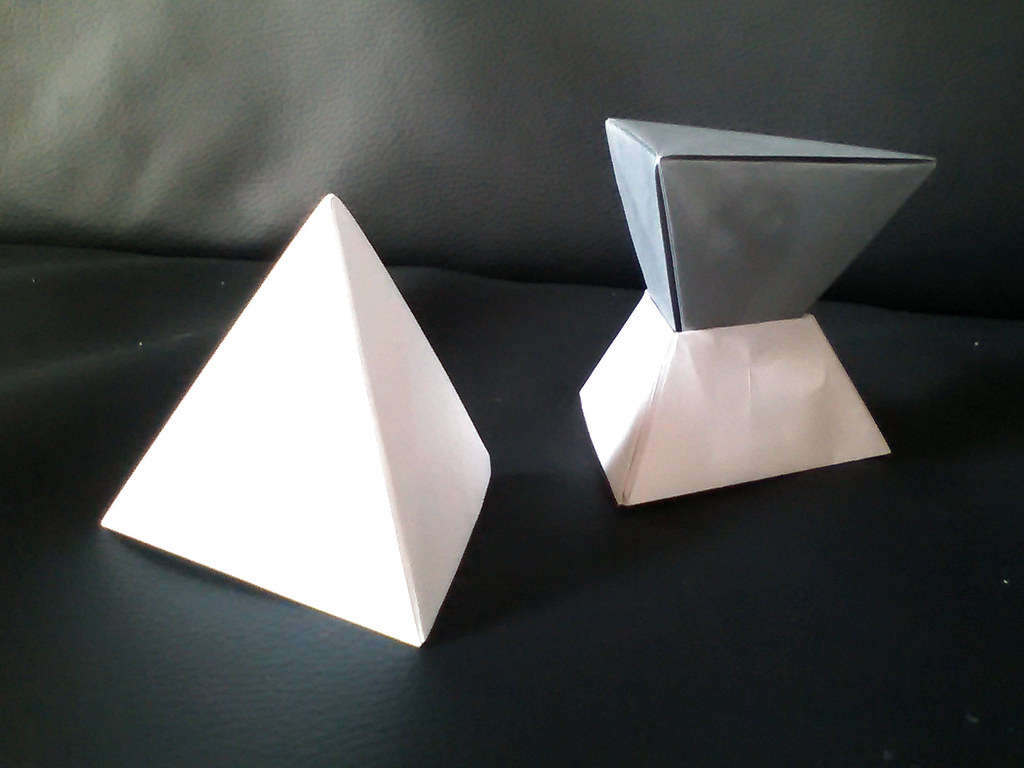
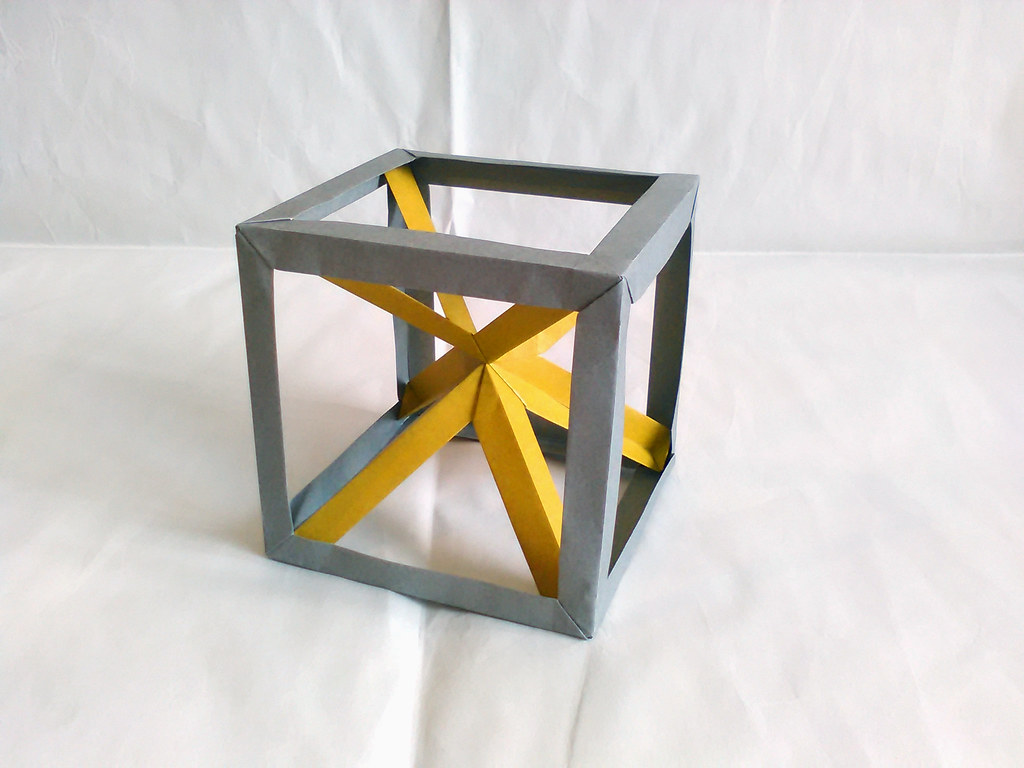
The simple cubic structure is naturally just a cube. For the other structures, I needed a larger cubic frame to represent the bounds of the unit cell in addition to the connector pieces. Following a bit of math, the frame of a body-centred cell is 2/√3 times the length of the connectors. The connector (A) and the frame piece (B) look like this:


Note that I added 1/4 of the paper width again for the cubic frame. The outer frame is folded just like the simple cubic structure, whereas the connectors have to be folded to join at an arccos(1/√3) angle. The following CP achieves this goal:


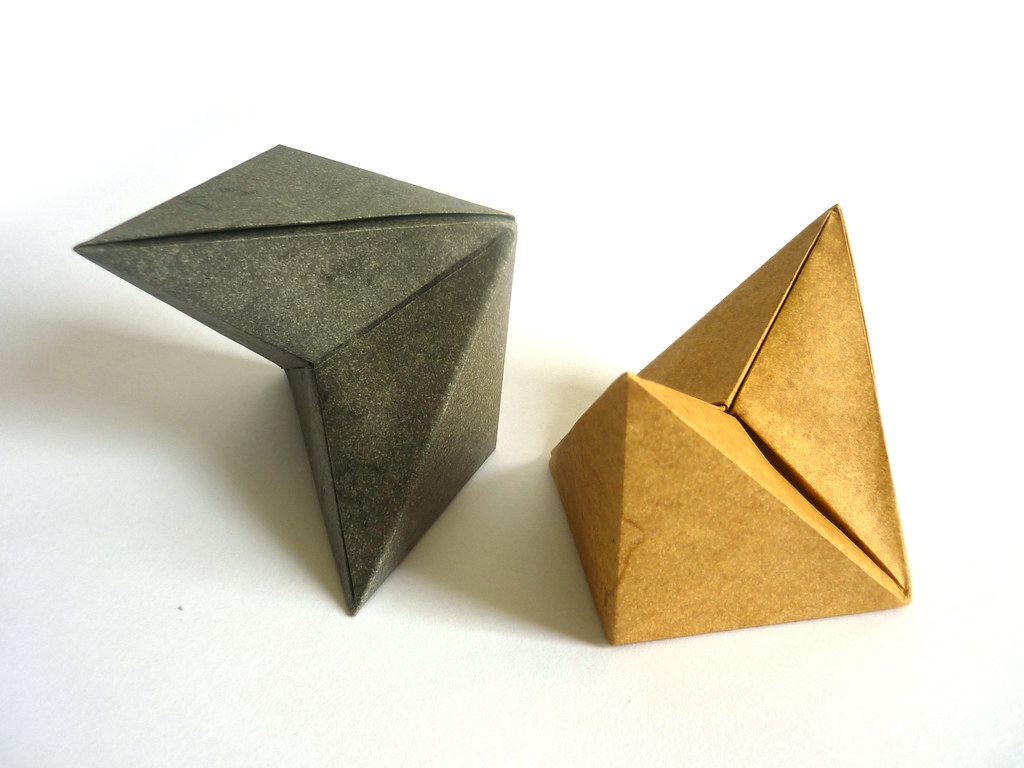
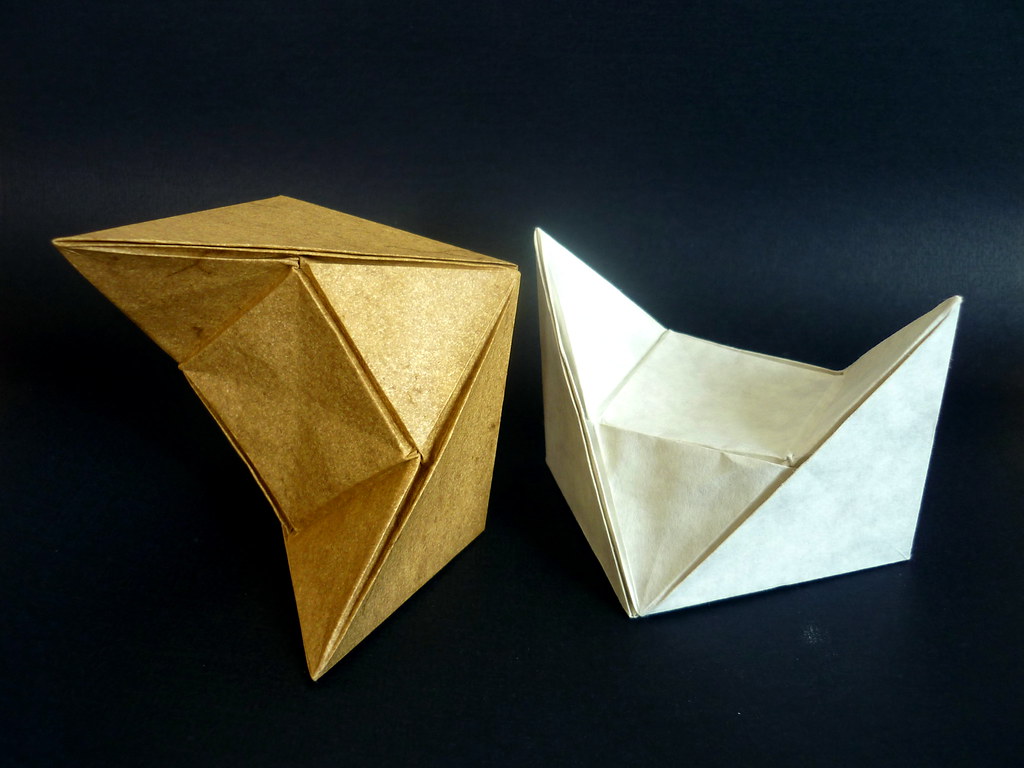
The unit only connects on one side, while the other side just hold the unit's shape. Ideally, the non-connecting end should be folded with an angle slightly greater than 45°, such as:


Using 12 frame pieces and 8 connectors (4 of which should be the mirror image of the others) gives this:

Crystal structure unit cells

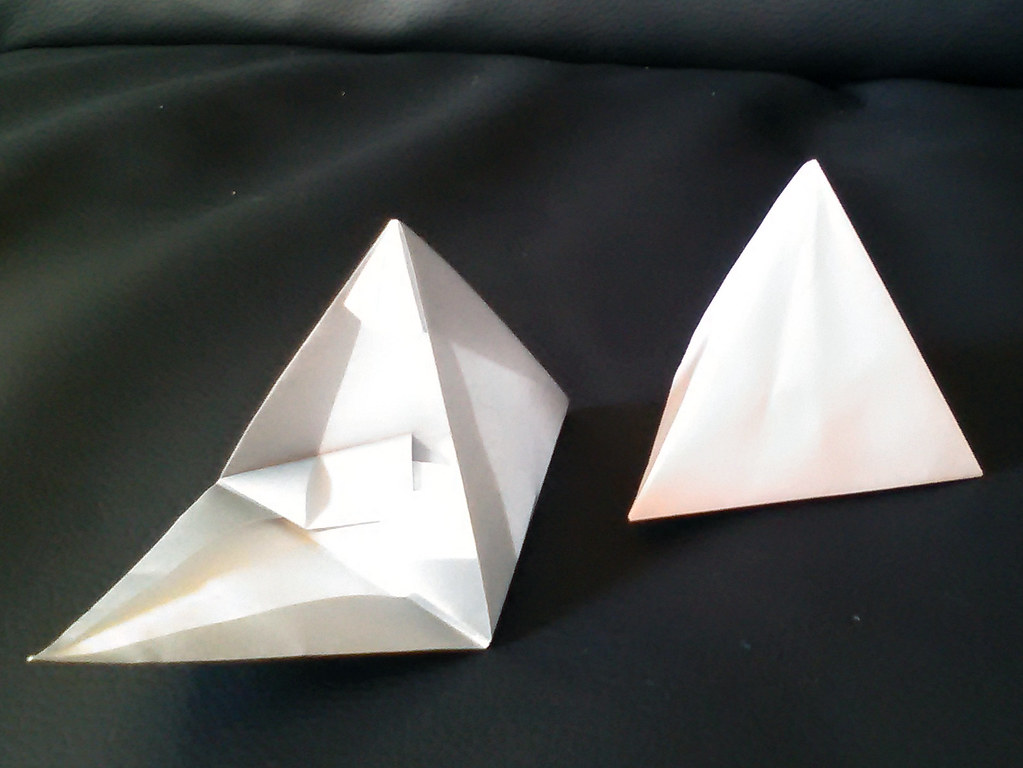
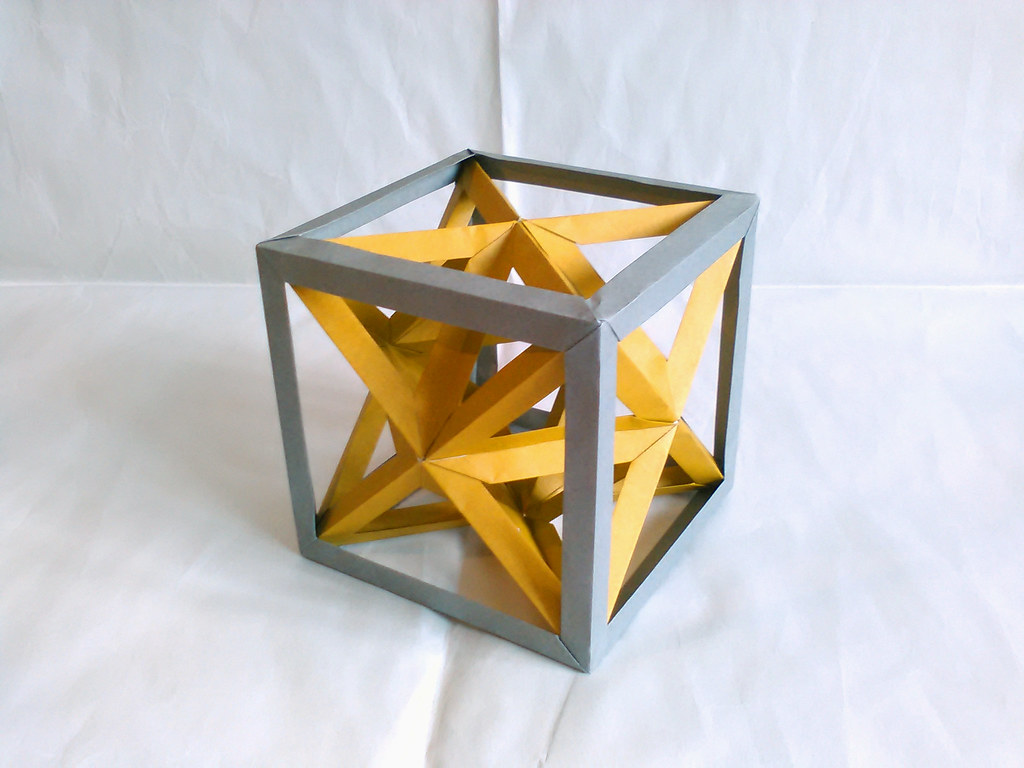
Finally, the face-centred cubic structure. As the name "cubic close-packed" suggests, this structure is the unit cell from stacked triangular lattices so the angles between nearest neighbours are all 60°. In this case, my work is cut out for me by Francis Ow. The cubic frame is 2/√2 times the connector length (plus the extra 1/4 of the paper width), which looks like:


And, for completeness, the CP for Francis Ow's unit is:


12 frame pieces and 36 connectors (12 mirrored relative to the other 24) come together to make:

Crystal structure unit cells

Most importantly, the three structures together with the same original paper size look like this:

Crystal structure unit cells

Sunday, August 6, 2017

Cutting cubes

In my last post I mentioned that I had been thinking about folding simple but interesting geometric shapes. I guess that I still had the k-dron in mind, because I decided to try making another cube bisection. I realized that bisecting a cube to two equal pieces has to involve the central point inside the cube and some symmetry about that point. Based on this, a simple way to get the pieces involved was to draw lines from the central point out to the corners of the cube. Alternating between connecting to an upper corner or a lower corner gave a simple saddle point geometry which wasn't hard to find the references for because of the √2:√3/2:√3/2 triangles.


The lock on the bottom of the model took a bit of playing around with. At first I wanted to use half of the cube width, but it ended up too weak. Eventually, Roman Remme came up with a simple symmetric lock as shown in the CP.

Pointed saddle cube bisection

Pointed saddle cube bisection

But that's not all! I realized that there was another way to make a saddle point in a cube. Instead of having edges directly to the centre of the cube, I could have a flat square in the centre with equilateral triangles connecting to the corners. Here is the resulting CP:


The references are 15 degrees from the corners, which can be folded quite easily as mentioned in my last post. The lock for the bottom of the cube was the same as before. From the side, the result reminds me of the 元宝 (yuanbao), an old form of Chinese currency.

Flat saddle cube bisection

Flat saddle cube bisection

Because both models were based off the same geometric shape, I decided to call the first a pointed saddle cube bisection and the second a flat saddle cube bisection. The best part of these models is being able to take the two pieces apart and fit them together.

Friday, December 30, 2016

Simple solids

After folding a new-and-improved k-dron a year and a half ago, I was thinking a lot about folding closed 3D solids with flat faces in a similar manner. The idea came up again recently and I decided to try something simple as a test. What simpler shape than a tetrahedron?

My idea was to try to use paper efficiently and equally for all faces and edges. Instead of having every face join at the edge, I opted to have all but one edge not touching. After some trial and error I found a simple lock from where two of the edges come together, as well as the reference for a 15 degree angle (which I have no doubt has been found before).


I'm happy with the result, despite the fact that the lock ruins the otherwise clean faces of the model. There is way to get the excess paper from the sides of the locking face to hold a lock behind it, but it doesn't hold as tightly. Let's just say the colour change on the lock means the tetrahedron could double as a snow-capped mountain or Christmas tree.

Tetrahedron and intersecting tetrahedra

Tetrahedra

Friday, February 19, 2016

Eight months to publication

Unless you count the dolphin, I haven't really designed a fish that I've been satisfied with. The idea was very simple (based on a preliminary base), but with the original colour changes and the big sail on the back the original design didn't look like anything in particular. I wanted to make it into a marlin or a sailfish at the time, but I couldn't decide how to fix the colours. Here is the CP for what I'd come up with:


I kept coming back to this designs, making an iteration about once a week. I was finally satisfied with the design just the other day, so I folded the final version to post online, looked at pictures of marlins and sailfish to decide which it was and realized it looked like neither. Luckily, realized that to make it look more like a marlin I just needed to add a ventral fin and change the tail colour and I had enough extra paper for both with the same base.

Marlin

Saturday, September 5, 2015

Blubber

Sometime around last December I decided that I wanted to fold a walrus. I've seen a several orgami walruses, but most that I remembered were either very anatomically correct or focused on only the face. My goal with the walrus was to make a cartoonish model that focused more on the volume. In other words, I wanted to make a ball of blubber with eyes, tusks and flippers.

I didn't have much time to design until near June, and then I came up with something that I am happy with. Here is the crease pattern, which I should not will not lie flat:


Adding details after folding the base is fairly straightforward. All that remains is a couple thinning folds to the front flippers and tusks as well as some folds to bring out the eye flaps. The most important part is making the model round. This model was originally intended to be wetfolded, but unfortunately I didn't have any good paper for wetfolding when I made the final model.

Walrus, Ryan MacDonell

Walrus, Ryan MacDonell

This is one of a few models that I had time to design, so with any luck I should have time to fix up and post the others in the next month or so.